Design a Crazy Quilt
Inspired by the crazy quilt in the Nursery, we’ve put together this paper-based activity to get your creative juices flowing.
-
More about our Crazy Quilt
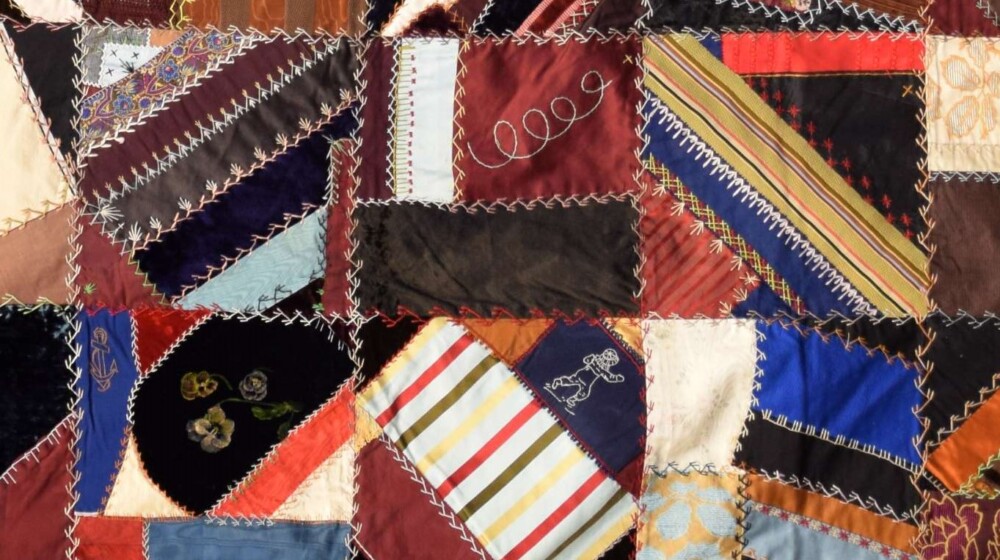
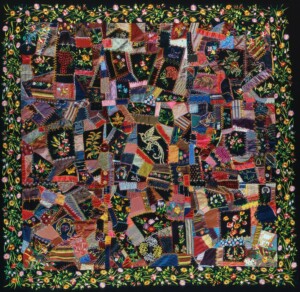
 Our crazy quilt is a classic of the high-style and was made between 1875 and 1900. It is composed of satin, brocade, velvet and velveteen ribbon in jewel tones and is lavishly embroidered.
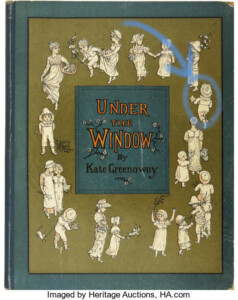
Some of the embroidery is probably purchased and based on Kate Greenaway drawings. Greenaway was a popular 19thc artist known for her illustrations of children’s books. Fairies, flowers and sickeningly romanticized images of children were extremely popular and widely imitated. One visitor thought this little guy, who appears on our quilt, was a spaceman!
The quilt was donated by Beth Osborn, a long-time supporter of the Rosson House. She inherited the quilt from her father. It may have been produced or purchased by Carrie Bray, her maternal grandmother from Michigan.
Explore our collection of quilts at The Quilt Index. Click on the picture to see an enlarged view of the entire quilt.
-
How do you make a Crazy Quilt?
I was always told that crazy quilts were made from scraps left over from making a lady’s dresses, but the average woman didn’t have that many clothes – and certainly not so many rich velvets and brocades. Scraps, some already with embroidered designs, could be purchased expressly for these quilts, and you could trade scraps with your friends — like Sheldon and Leonard traded comic books.
Crazy quilts are different from traditional quilts. Typically, a topper is pieced together according to a pattern. The quilting happens when the topper and bottom sandwich a layer of batting with a decorative stitch. With Crazy Quilts, the scraps are sewn onto muslin backing. Then, you embellish the heck out of it, and finally you make the sandwich and anchor it together in strategic spots – not with all over quilting stitches.
This is a great tutorial if you want to make a real quilt block. Or speed it up without sound and watch this lovely quilt square come together. Ivory Blush Roses Video
-
What makes it Crazy?
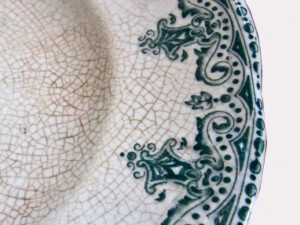 Crazy refers to the lack of pattern – similar to crazing on ceramics.
Textile scholar Beverly Gordon says, “The ‘crazy’ look was seen as the epitome of urbane, sophisticated taste. Asymmetrical, irregular geometric pattern and crazed lines (the term came from ceramics) were associated with the Japanese style, which had taken the public by storm at the 1876 Centennial Exposition in Philadelphia.”
If you want to know more about crazy quilts, there is a great online exhibit titled a Fairlyland of Fabrics at the International Quilt Museum.
-
The Craze for Crazy Quilts
Apparently, women got a little obsessed with making these quilts. Here’s a poem from 1890 descrying the resulting disruption:
And where is the wife who so vauntingly swore
That nothing on earth her affections could smother ?
She crept from your side at the chiming of four
And is down in the parlor at work on another.Your breakfasts are spoiled,
And your dinners half-boiled,
And your efforts to get a square supper are foiledBy the crazy quilt mania that fiendishly raves.
And to which all the women are absolute slaves.— Good Housekeeping, Oct 25, 1890
What you will need to create a paper version of a crazy quilt:
-
- A template — 2 copies
- Having a pattern makes the design work simpler — or you can go rogue and make it up as you go! There are no rules in crazy quilting.
 Paper you can cut up
-
- Use materials you have around your house – old catalogs and magazines, gift wrap, sheet music or pages from a book, things you print from the internet, old birthday and Christmas cards, even old fabric scraps.
- Remember – ALWAYS ask a parent or guardian before cutting ANYTHING!
-
- Creativity!
-
- Consider your design. Do you want darker colors around the edge going lighter toward the middle? Darker on the bottom going to lighter on the top? Related colors or contrasting colors? What will be the center of your design (piece 6)?
-
- You’ll also need scissors, a glue stick, colored markers
- A template — 2 copies
Steps:
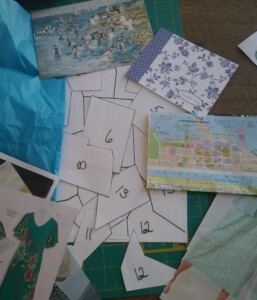
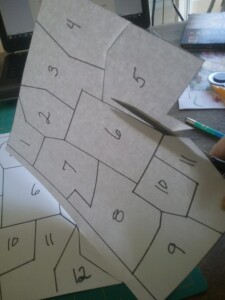 Print 2 copies of the template. Cut one apart – this will be your template for cutting individual pieces. You will assemble the individual pieces using the other page as your base.
.
.
.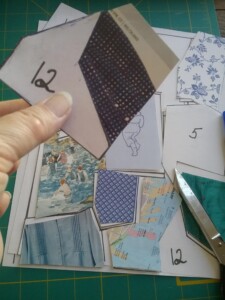 Find suitable pictures to use for each pattern piece that meet your design plan.For each piece, trace the outline of the pattern piece and cut it out.
.
.
.- Once you have all the pieces, stick them down using a glue stick. Other glues might leave bulges or wrinkles in the paper. Be sure to glue down the edges.
.
.
. 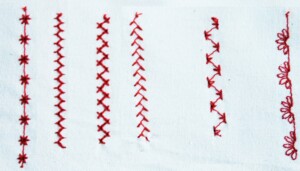 Now, use markers to add the decorative stitches. You can use this picture as an inspiration for making your stitching marks or look at actual quilts below. I practiced first on a separate paper which helped a lot.
.
.
.
.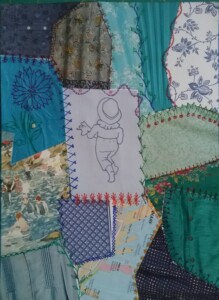 Trim up your edges and share your creation! Here’s mine with a print out of the “spaceman” from the Rosson House quilt.
.
-
Resources and Inspiration
– Check out a picture of the entire Rosson House Crazy Quilt
– See more examples, like details of this one, here.